Showing posts with label Checklist. Show all posts

Thursday, September 8, 2011

The things we have learned

For novices who seriously had very little clue about the whole house builing process, I think we did okay however we did learn a few things along the way...

(1)  Go over your contract & drawings with a fine tooth comb.  Then go over them again.  And again.  Each time we went over our drawings we'd pick up something new! 

Pay particular attention to the little things like which way you want your doors / shower doors to swing, are your windows centred on the drawings, are your window heights all level with each other, are the heights of your openings the height you would like (we wanted 2340mm square set openings like the display house but the standard was lower, there wasn't any extra cost to raise them). 

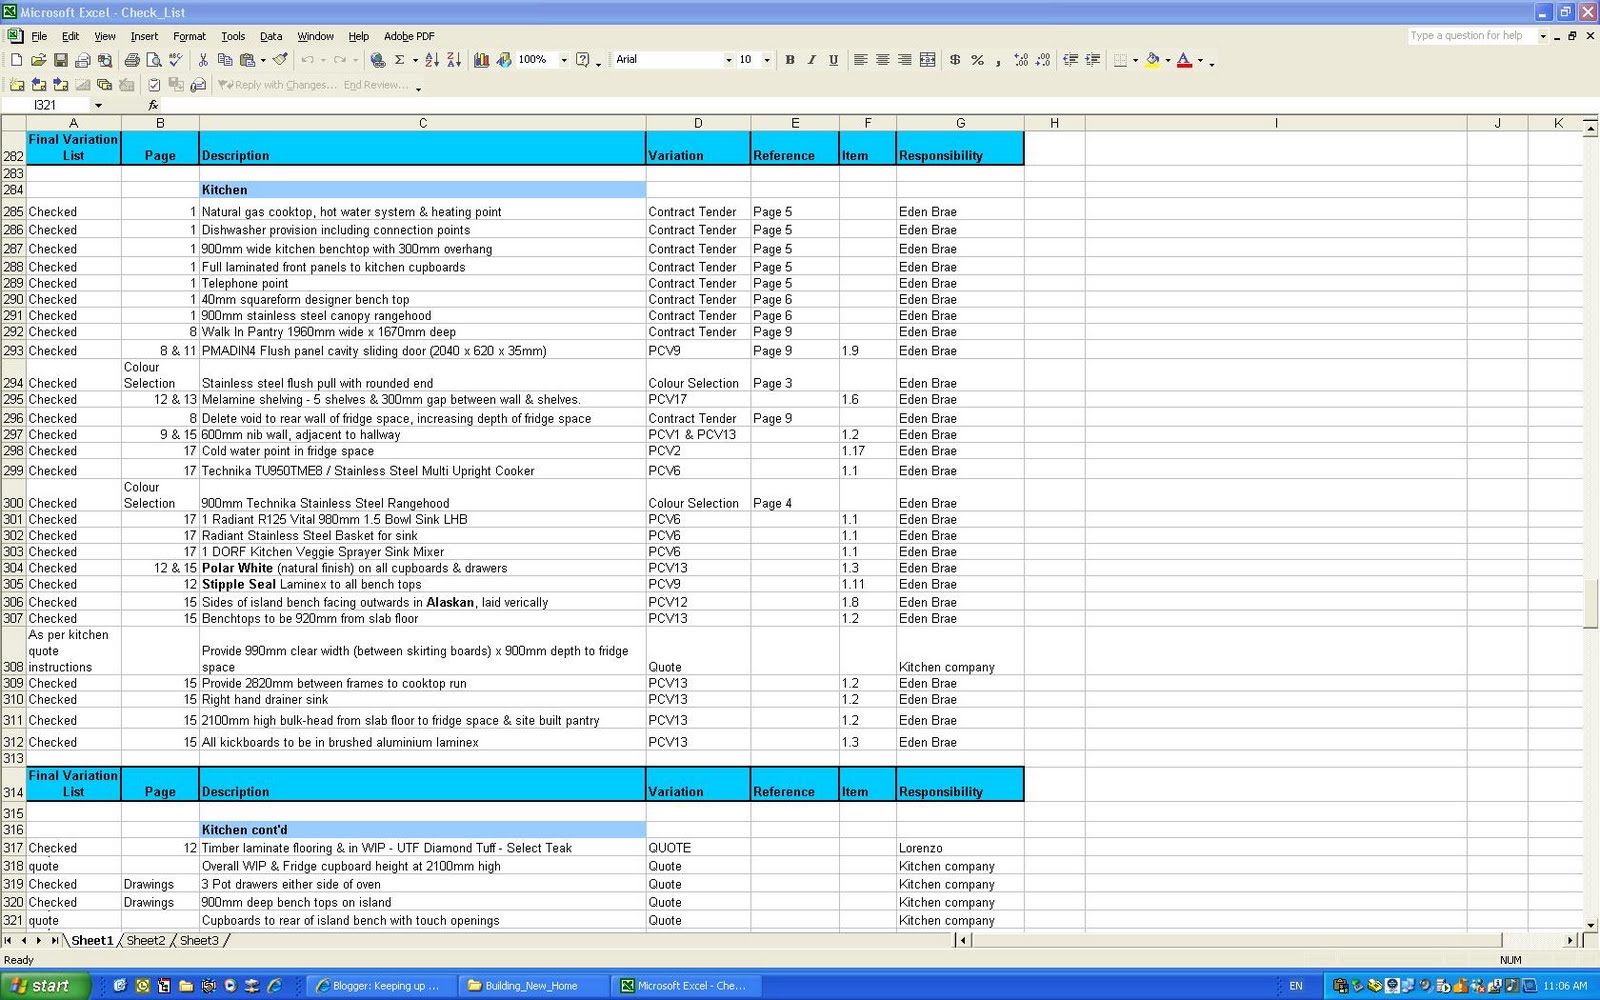
We had so many variations that I ended up doing an excel spreadsheet (snapshot below) and went through each page of the contract, room by room and noted what should be in each space.  This really came in handy at walk through when our SS had one thing noted and I had another as I could tell him exactly where the written instruction could be found.  Also made life so much easier for us knowing exactly what was meant to be where.  So many months pass from when you originally choose things that it can be easy to forget exactly what door knobs you selected...

(2) Turn on the '"read recepit" on your email. Helpful to know that your emails have been read if you haven't received a response.


(3)  When you're in the contract stage and adding things in, changing things around etc, liaise with your Customer Service Consultant by email so everything is in writing.

(4)  Have you made your windows larger?  Can be difficult to get certain window furnishings.  We found that with our 2600mm wide windows in living areas.  A lot of blind fabrics only span 2400mm.  In the end we chose to "rail-road" the fabric which means the fabric hangs the other way and it's ok but it does have a slight ripple effect to it.  Hardly noticeable in the sheer fabric but was quite obvious in the blockout blinds they had accidentally first installed.

Sheer fabric


Block-out fabric


(5)  If you choose timber flooring, you might want your internal doors to be a little longer.  We found out too late that the internal doors allow for carpet so they sit about a good inch off the finished floor level.  Not the end of the world but I would have definitely chosen better fitting doors had I known.

(6)  If you raise the height of your ceilings, you may want to increase the height of your doors too.  We didn't worry about the bedroom doors but for the front door and the granny flat which has the internal door in the Entrance Hall with a ceiling height of about 2900mm we raised the door sizes accordingly.  It would have looked ridiculous otherwise.

(7)  If you are on recycled water, the standard inclusion is 1 recycled water tap. Don't assume you automatically get one at the front and back of the house like we did.

(8)  Get yourself a good Mortgage Broker, it makes all the difference sometimes in getting the loan for the amount you want or getting the best deal.  Hey, we all try and push the limit don't we?   We used Kevin Lee from Smartline and we did everything over the phone, fax & email.  He was great and it was so convenient.


(9)  And last but definitely not least, read this thread from the Homeone Forum.  It's 18 pages of other people's hindsight!


And we all love a bit of hindsight!

Saturday, May 14, 2011

She's making a list and checking it twice....


Seeing that we're coming towards the end of our build, I though it was time to dust off the list I started putting together before our build even started, that contains a whole heap of handy things to check for in our final inspection.

I hope that it helps others who are yet to get to this stage and I also hope that the lucky one's who are already in their homes might care to share any additional tips. Pretty please?

Some are a bit Captain Obvious, others not so.  Here goes, in no particular order:
  • Paint thinning - many painters thin down the paint to keep it cheap
  • Paint drops - look for unsightly paint marks
  • Doors - make sure they are hung correctly and that cupboards are level
  • Doors - make sure that all external doors have been painted on top, sides & bottom to prevent swelling
  • Doors - make sure they sanded doors before being painted, otherwise can be a rough finish
  • Light switches - check there are no marks in plaster around the fitting
  • Flyscreens - check they're all there
  • Drainpipes - make sure they are all installed correctly and that they are not dented (they dent easily)
  • Brickwork - is it all level?
  • Expansion joints - have they been filled?
  • Try every door & window to make sure they all work
  • Try every tap & make sure the hot & cold are the right way round
  • Try every light switch
  • Check every powerpoint (a small night-light would be perfect)
  • Flush every toilet
  • Check the mortar around windows etc to ensure there are no gaps
  • Check the plasterboard around eaves to make sure none have fallen
  • Check roof tiles to ensure none are cracked - ask for some spare tiles too if possible
  • Check the roof & walls in all angles (for defects)
  • Windows - check they don't rattle
  • Check your roof insulation is complete
  • Check all floor wastes are there
  • Check all the drawers work (kitchen, bathroom etc)
  • Check outside taps, lights, drive way etc
  • Inspect every surface for scratches (kitchen, bathroom etc)
  • Check the oven works (and dishwasher etc if installed)
  • Check the air-conditioning works and the different zones work
  • Check flooring

Word on the street is that you can only have ONE final inspection and can only submit ONE final defects list.  Of course, if things break after you move in then you are covered.

Our mission final inspection day is going to look a little like this...
  1. I will have requested that the house has had it's final clean before inspection.
  2. We'll pack night-lights for powerpoint testing, drinks & lunch to keep us going, torches to better see defects, scratches etc, ladder to check in ceiling and of course we'll each have a check list dedicated to checking different items in the house
  3. 'B' & I will both allow the full day to go over everything - we'll probably start around 8am to ensure that we've got plenty of time to conduct our one and only inspection
  4. If we have an independant inspection, we'll have that happening on the same day
With any defects, scratches or imperfections - apparently they will only be accepted as a defect if it can be seen in natural daylight.  So while a torch will help to detect it in the first place, keep that in mind.

Have you got anything to share?  Would love to hear it.

ETA: For the Mother of all checklists, see here...

The Mother of all Checklists!

Image courtesy of YHL

After my last post on the Final Inspection Checklist, one of the lovely members at the Home One Forum *waves to Belinda* kindly passed on the Mother of all Checklists which was compiled by another lovely member *hi Amanda*

Are you still with me?  Good.

I asked Amanda if she'd mind in turn if I passed on the 44 page - yes, 44 page - checklist to anyone else that may be interested and she was more than happy.

The list has been designed around Amanda's house of course so you just need to adapt it to your own house.  It is the most comprehensive list I think you could possibly come up with.

So if you'd like a copy, please just send me your email address over here.


Related Posts Plugin for WordPress, Blogger...