Tuesday, August 30, 2011

Cheeky Monkey

Three cheers for our parcel delivery person who finally realised our address exists today!!!

After 3 parcels were returned to sender courtesy of said delivery person, today we got a nice surprise left on our door step.

Removable wall decals from etsy for my 2 year old son's bedroom.  They're quite fitting seeing that he's a cheeky 'lil monkey himself.


Took me a while to choose something for his room as I didn't want anything too baby-ish or big boy-ish.  Hopefully they'll see him through the next few years until he forms an opinion of his own and decides they're naff!


If you're wondering what little creature lives in the aquarium above, it's Lulabelle, Ryan's spiny leaf insect... She's very cool!


They didn't half take a while to put up but we all love the finished result.

Friday, August 26, 2011

Bring on the warm weather!

The backyard is nearly finished!! 

My Dad and 'B' have been madly building a deck.  All the joists and framework has been completed and the merbau boards will go on next. The retaining walls are all done, just waiting for some soil and turf to go down now (we've been letting the new ground level settle and settle it has with the recent lot of rain).

In celebration *cough* call it what you will, I just "won" the following outdoor table & chair set on ebay for $898.88!  'B' is stoked when I win on ebay, no truly. He loves nothing more than driving all over Sydney picking up my winnings!


Here's a better idea of the colour, it's showing up a bit dark in above pics!


It's verrrry similar to another set I saw at BBQ's Galore over the weekend which sells for $1999! Happy with my $1100 discount, thanks very much!  And this is where I should add that 'B' truly is happy!  He loves a dollar saved, that guy. Bless.


What I love about this outdoor setting is that the chairs all sit flush under the table (with the exception of the end 2 which will sit on a separate section of deck when not in use).  Sitting flush is quite important to us because when our lovely bi-fold doors are open, they take up quite a bit of room - which has meant our ginormous, wide 10 seater setting is about to get an ebay listing all of it's own!

See what I mean?!  And I know!  How shameful I don't have a current pic of our doors!


Anyway, the budget has all but been spent now (and then some) so it will be a while before any new purchases I imagine.

** I wonder if anyone who builds a house comes in on or under budget?? **

Promise to be back soon with a backyard piccy update.


Wednesday, August 24, 2011

Great balls of wire...

Apologies for the corny title but I couldn't resist!

Remember when I bought these pendant lights back in April??  Well today they went up above the dining table!!

And we love them!


I ended up buying 2 new ceiling plates as pictured above for $10 each because the ones that came with the lights were a little cheap looking.  Still though, $72.50 each in total isn't bad.

We've still only got bare bulbs everywhere else for now but we'll focus on the rest of those a 'lil bit later.

In other news, the backyard is coming along really well.  I'll post some progress shots soon.

Wednesday, August 10, 2011

Come on in!

....and take a look around our new home.

Our front entrance.  
We raised the ceilings to 2590mm throughout and it's raised to about 2800mm in the entrance. 


Looking back at front door.  The strip of carpet is there only while it's still grubby outside.  Need some art on the wall and some downlights.


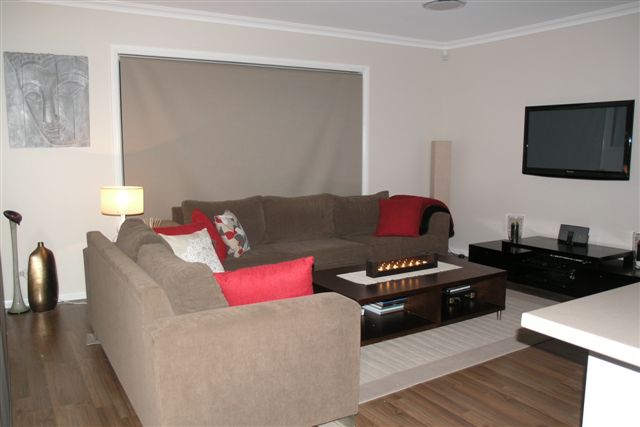
Dining and Living Rooms


I love my sunburst mirror


Kitchen


Our Kitchenaid which is responsible for the splashes of red throughout the house


True colour of splashback


Walk-in-pantry. 
There's shelving on the left as well which is where we keep our microwave & toaster.  Very hard to photograph in such a small space.


Family Room.  You might notice the blind hanging a little awkwardly? Because the window was so wide, the fabric with it's natural fall didn't span that distance so they had to "rail-road" it which simply means hang it the other way.  Unfortunately it therefore it doesn't hang as perfectly as it otherwise would however it's not quite as obvious in real life when a camera flash isn't high-lighting it's imperfections.  Oh and they (Abbey Blinds) accidentally hung block out blinds in all these rooms instead of sheer blinds so I'm hoping it will be less obvious again in a lighter fabric.
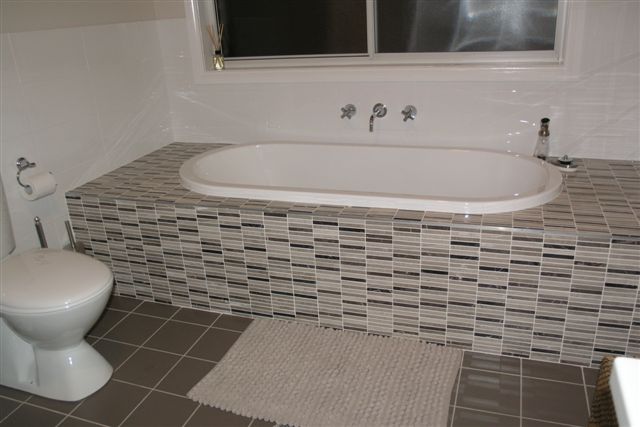

Main bathroom


Main bedroom.  Looking a little plain at the moment.  I have a few things in mind though.


Our ensuite


My son's bedroom


Still a little plain at the moment as I couldn't find another decal I really liked until recently...


However I bought this one a few days ago from this shop on Etsy.  The tree is just under 2m tall so should fill the wall nicely.  It's particularly suitable for my mischevious, climbing little charmer.


Love these little guys.  So does he apparently as they end up in his bed each night.


My other son's bedroom


Oops, just noticed his name is crooked.


Loving his feature wall!  He loves Space and Planets so it only seemed fitting.  I've had the decal for months after seeing it on a friend's son's wall (hi Lisa).  It's from My Munchkin Home.  Oh and if you think it looks a bit sparse on the left, that's where the door usually sits open and my son requested the small, medium & large star combo thingo going on if you think it looks a bit odd like 'B' did.


Here we have the playroom / guest room.  Though it's got a whole lot more of a playroom thing going on.  It's such a great room with one whole wall with wardrobe space and french doors that open up to the backyard.


So there you go, that's our home as it currently stands.  Still need to hang a few pictures and do all our lighting and that's on top of the landscaping so it will be a work in progress for some time yet.  Loving every minute though!


Monday, August 8, 2011

What I got up to over the weekend!

I made a Kid's Art Gallery!  Ta da!! 


Well technically, I just hung the frames and the kids took care of the "art".  It only cost $29.30 too thanks to the colourful Ikea frames!

It's positioned between each of the boy's bedrooms in the hallway and it makes us all smile when we see it.  Especially Mini Picasso and Tiny Van Gogh.

Here's how I did it... 

I worked out what pattern I wanted the frames in on the floor.  I tried a few different ways but soon realised I prefer a more orderly pattern / shape. 


Then I cut out the shapes of each frame & put them on the wall.


I had already measured and drawn a spot on each paper so I knew where to put the hook.


Then I hung the frames up & pulled the paper down from behind.

And lastly I filled the frames with masterpieces.  I used a little blu-tak on the bottom of each frame at the back to keep them from going crooked.


And here's the photo I've had in my "inspiration" folder for aaaaages and from which  I drew my inspiration from.... Unfortunately I don't recall whose photo it is.


Related Posts Plugin for WordPress, Blogger...